git
git
分散バージョン管理システム

tortoisegit
Windows用のgitクライアントソフト
http://code.google.com/p/tortoisegit/DownloadからTortoiseGit-x.x.x.x-32bit.msiのようなファイルをクリックしてインストーラをダウンロード
Source Tree
Windows,Mac用のgitクライアントソフト
http://www.sourcetreeapp.com/(記事作成時のバージョン、TortoiseGit-1.3.6.0-32bit.msi)
インストール

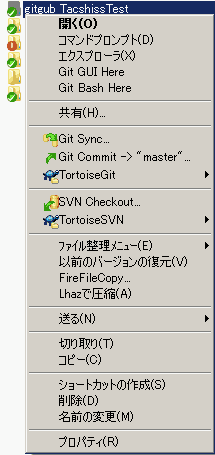
コンテキストメニューにGit Sync等の項目が表示される
gitHub
ソース管理・公開用のwebサービス

gitHubに登録
E-mailとPasswordを記入してSign In する
https://github.com/「Create a Repository」から新規レポジトリを作成 任意のプロジェクト名を命名
http://github.com/username/repositoryname のようなURLからレポジトリの設定を行う以下のような案内が表示される
Global setup:
 Download and install Git
  git config --global user.name "Your Name"
  git config --global user.email account@mail.com
  Add your public key

Next steps:
  mkdir ProjectName
  cd ProjectName
  git init
  touch README
  git add README
  git commit -m 'first commit'
  git remote add origin git@github.com:username/ProjectName.git
  git push origin master

Existing Git Repo?
  cd existing_git_repo
  git remote add origin git@github.com:username/ProjectName.git
  git push origin master

Importing a Subversion Repo?
  Click here

When you're done:
  Continue
認証キー
SSH用の認証キーの設定
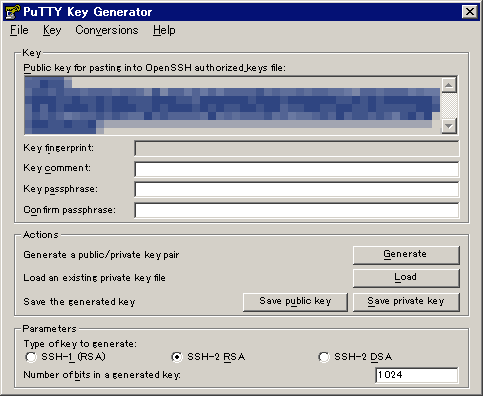
\TortoiseGit\bin\puttygen.exe起動「generate」をクリックし、適当にマウスを動かす
「Public key for pasting in to OpenSSH authorized_keys file 」内のテキストこコピーし、ssh_pub.txtのような名前で保尊しておく
「Save private key」をクリックして ssh_key.ppkを保存する
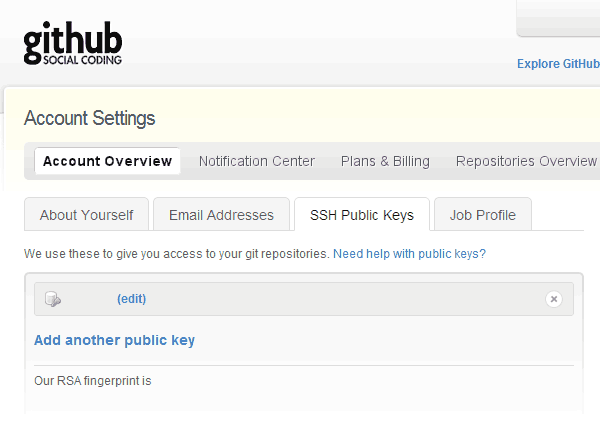
githubのAccount Settings の SSH Public Keys の項目から Add another public key をクリック
先程作成したssh_pub.txtのテキストをペーストする
TortoiseSVNの設定
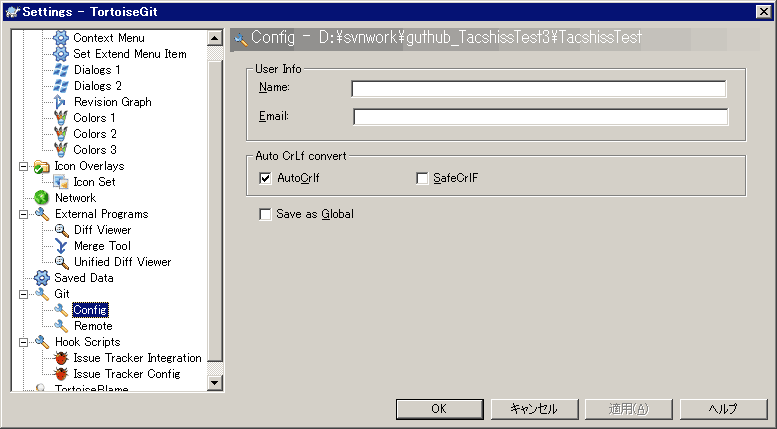
適当なフォルダで右クリック→ TortoiseGit→Settings→Git→Config 選択
Nameは適当に、 Emailはgithubで登録した情報を登録
TortoiseSVNでレポジトリをクローン
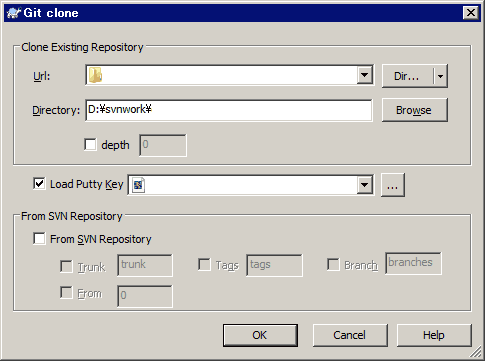
適当なフォルダを作成し、右クリック。「Git clone」選択
githubを参照してURLの項目に「git@github.com:username/repositoryname.git」のように記入。
Load Putty Key にputtygen.exeで作成した ssh_key.ppkを指定。OK。
TortoiseGitから

success と青字で表示されたら成功
ローカルでコミット
フォルダ内で適当なファイルを作成 (例:readme.txt)
ファイル上で右クリック→「Git Commit -> "master"」選択
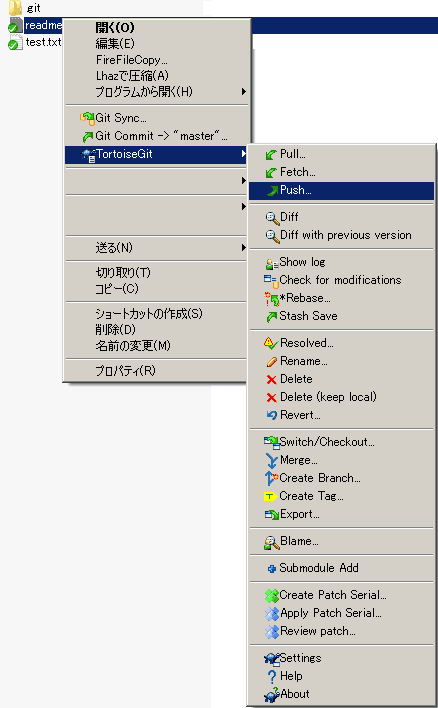
githubにローカルの更新内容をpush
ファイルを右クリック→「TortoiseGit」→「Push」
Local「Master」, Remote 「master」, Remote origin →OK
bitbucket
https://bitbucket.org/githubは無料では非公開リポジトリをつくれないが、bitbucketは作成可能。
bitbucketの無料版は共有人数に制限がある(5人まで)。
さくらレンタルサーバでgitをつかう
% mkdir ~/local/git-1.6.2
% wget http://kernel.org/pub/software/scm/git/git-1.6.2.tar.bz2
% tar -xjvf git-1.6.2.tar.bz2
% cd git-1.6.2
% ./configure --prefix=$HOME/local/git-1.6.2
% gmake
% gmake install
% emacs .cshrc
% git --version
% mkdir repos.git
% cd repos.git
% echo "This is my git repository" > README
% git init
% git add README
% git commit -m "first commit"